

How To Install A Bathroom Sink Drain Video
There's no reason to fear a bathroom sink installation. You've got this.
From framing it in to hooking it upward, you'll be washing your hands of your former sink and enjoying your new one in no fourth dimension.
Compare Bathroom Sinks on Amazon
Step 1 - Avoid Mutual Mistakes
Although it'southward non an arduous task, there are myriad ways this projection tin get sideways. Knowing the obstacles in advance volition help your bath sink installation go more smoothly.
First off, make sure you lot're following all local building codes. That means paying fees for permits if necessary and having an inspector sign off on the project if mandated.
Understand what size plumbing you need so y'all don't end upwardly with pipes that are besides minor to handle the required drainage.
Also consider the type of plumbing you currently accept compared to what you plan to use. For example, if you're attaching copper to galvanized pipes, be sure to use a brass or dielectric fitting between the two.
Another common mistake is failing to use plumber's tape. The product is ubiquitous for a reason—information technology'll save you from leaks and related impairment.
Exist sure to level your counter and sink equally you piece of work, and double check that you're leaving plenty length when working with supply hoses.
When cutting the capped supply lines to install your shut-off valves, cut the one/two" copper supply line at to the lowest degree 1 1/two-inches from the finished wall to permit for an escutcheon and shut-off valve compression nut and ring.
Also use circumspection when attaching valve, tubing, and hose fittings. Any misalignment can lead to expensive leaks.
Finally, when turning the water back on in your habitation, always run the exterior hose valve or affluent your toilets to bleed dirt and air from the lines.
This debris can crusade bug in your sink faucets and other plumbing trim.
Stride 2 - Rough in the Plumbing
Assuming you lot're working with completed household plumbing, y'all'll be connecting into the pipes in the wall and/or flooring.
Crude plumbing for a bathroom sink includes hot and cold supply connections and stub outs, shutoff valves, transition fittings, and possibly flexible tubing for above the shutoff valves.
Air chambers may also exist required.
Footstep 3 - Remove Former Fixtures
For a bathroom sink replacement, turn off the h2o at the source. So disconnect hoses or tubing and plumbing from beneath the existing sink.
Evaluate whether yous can get out the faucet in place or if you need to remove it from the sink.
Release the sink from the caulking and remove it to some other location. In that location may also exist clips holding the sink into place.
Pace four - Evaluate Framing
Depending on the type of sink you're installing, yous may demand to frame in the space to back up information technology.
Moving from a round to a square sink, for example, may require cut out a portion of the countertop.
On the other mitt, a vessel sink may not work with your current setup and then y'all may need to supervene upon the counter as part of your bathroom sink installation.
In improver to the actual support for the sink, ensure the clearance from the side of a bath sink to a toilet tank or finished wall is at least four inches.
Distance to an adjacent tub, nonetheless, may be equally little as 2 inches. There must besides be a minimum of 21 inches from the front end edge to a wall or fixture to come across most building standards.
Footstep 5 - Install the New Faucet
If appropriate, install your new faucet, aligning information technology with the holes in the sink and attaching the hardware.
Pace 6 - Place the Sink
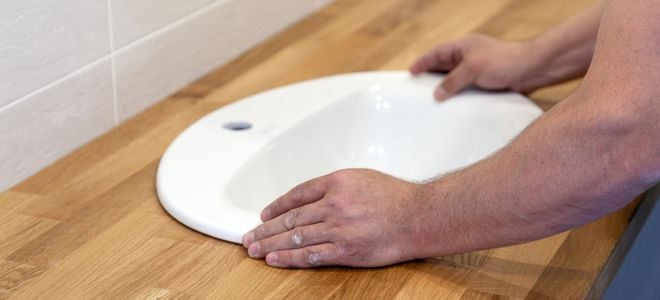
Depending on your system, the faucet may exist installed subsequently the sink placement instead of vice versa.
Place the sink into the space, applying caulking to the bottom of a drop-in sink and to the top of an undermount model.
This helps create a strong seal and eliminate leaks.
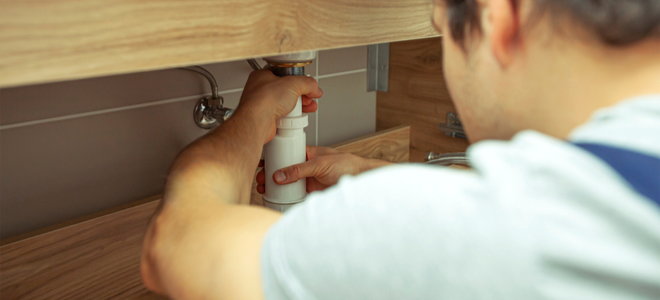
For a new installation, advisedly cut pipes and tubing every bit needed, using a wheel cutter to avoid flattening soft pipes.
Skid on the escutcheon, the coupling nut, the compression band, and the valve. Concur the valve outlet up and slide information technology over the compression band.
Tighten downward the coupling nut onto the valve using ii crescent wrenches. It will usually squeak when information technology is properly seated.
Connect the drain pipes beneath the sink.
Pace 7 - Restore H2o and Check for Leaks
When water pressure is restored, run h2o into the basin and check for any leaks around and below the sink.
When yous purchase through links on our site, we may earn commissions at no cost to you.

Source: https://www.doityourself.com/stry/installbathroomsink
Posted by: whitneynoeve1936.blogspot.com
0 Response to "How To Install A Bathroom Sink Drain Video"
Post a Comment